ShowTutorials.com
Refreshing your ideas and broadening your visions
Refreshing your ideas and broadening your visions
In order to start Java programming, we need some tools and environment. So, for developing java programs we require JDK (Java Development Kit). It consists for compiler, virtual machine and runtime environment which will help us to compile and execute the java programs.
For example, say we have a java program as Sample.java. We compile this using the command: javac Sample.java.
After running this command, JDK will create file Sample.class, which is the bytecode file
Sample.java -> (javac) -> Sample.class
Now we can execute the program in JRE using the command: java Sample
Following are the steps to install JDK on a Windows computer. Steps should be similar to other operating systems.
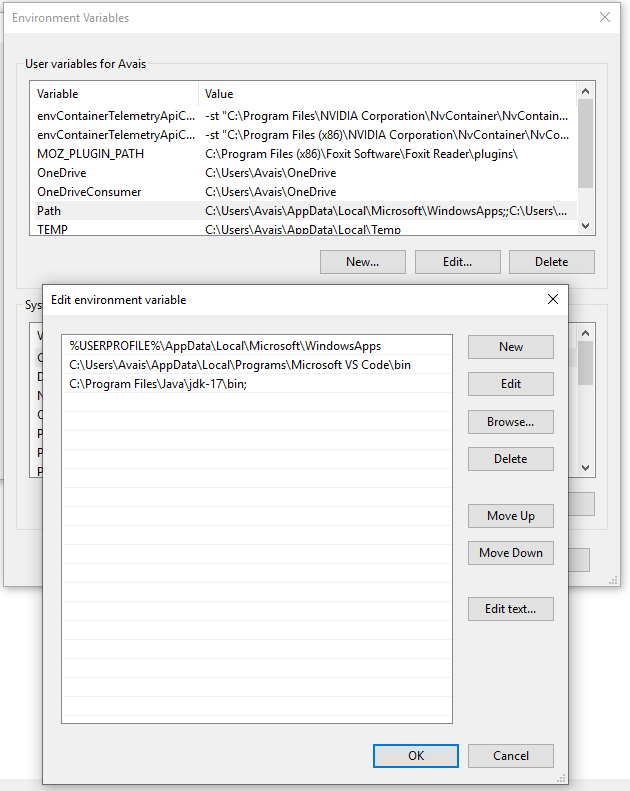
After installation, open the Command prompt and type java -version. It should show the java version. In case the command doesn’t work then we need to explicitly set the environment variables for java.